In This Topic
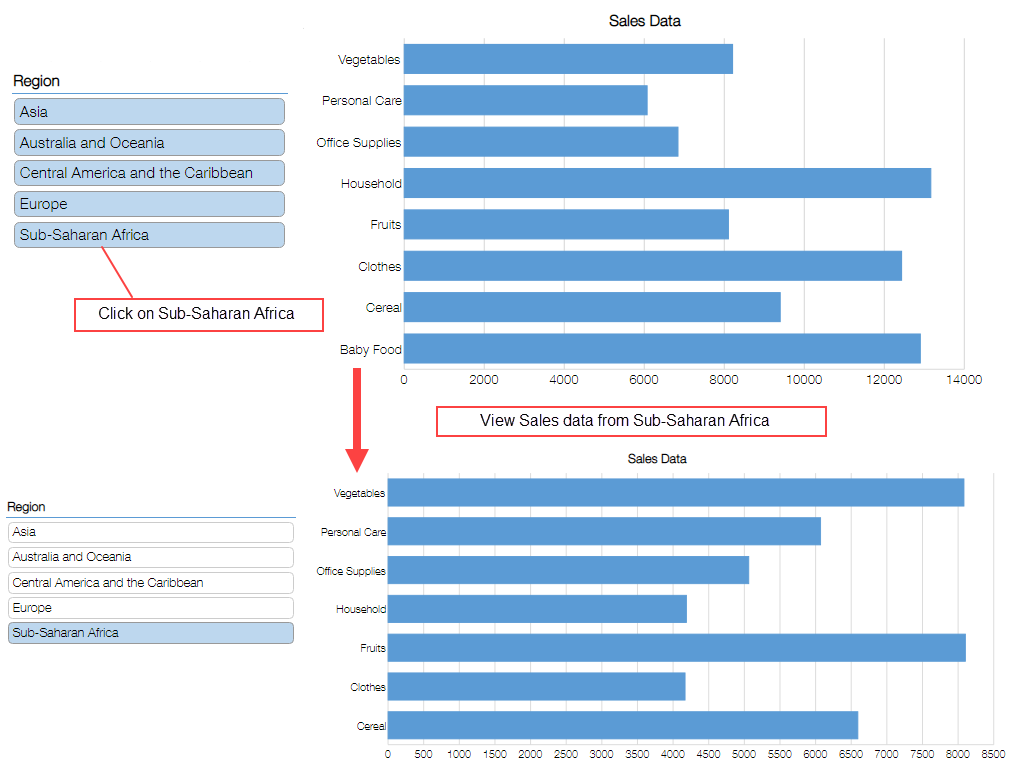
Slicer lets you filter the data to be aggregated and also lets you know the filtering criteria at a glance. It is used for filtering charts or pivot tables that use the same data app.
Below are the steps to create a Slicer.
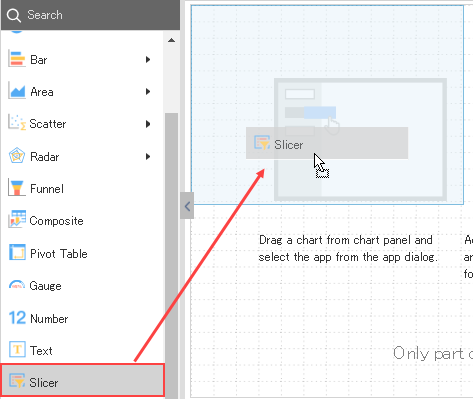
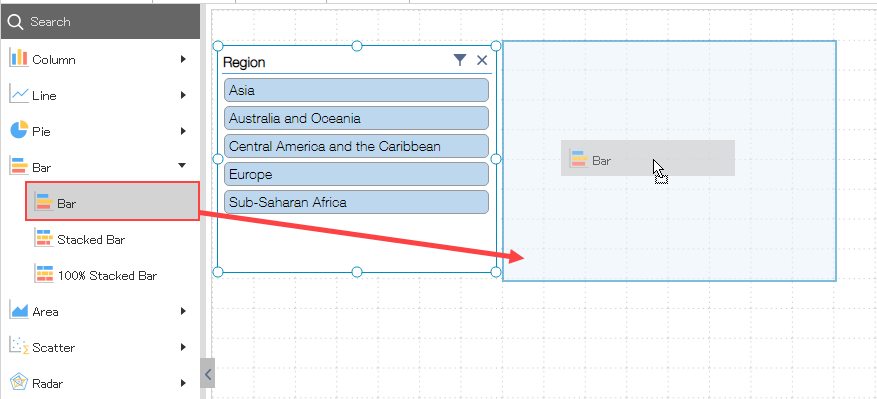
- Drag and drop a Slicer from the chart panel on left side to the page area.
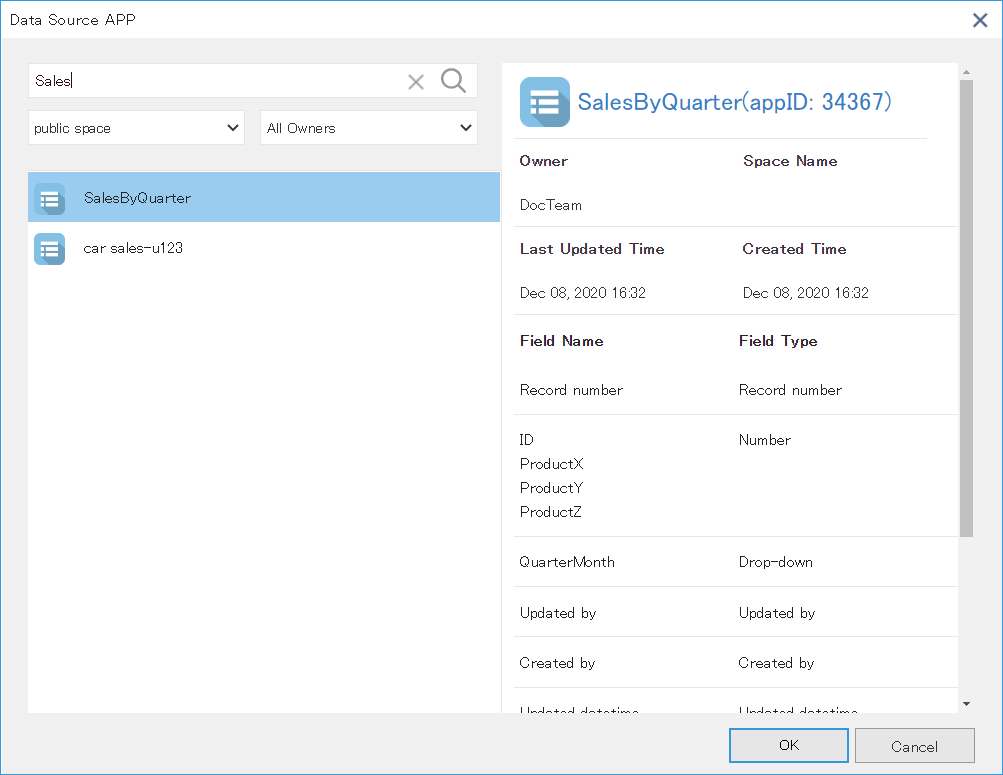
- In the Data Source App dialog, select an app to be used in Slicer.
Selected app can be changed by using the app selection icon in the Fields area.
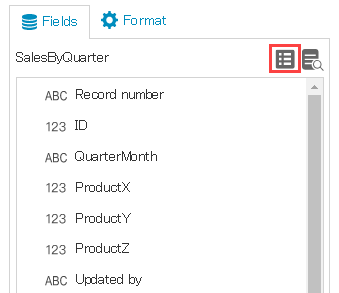
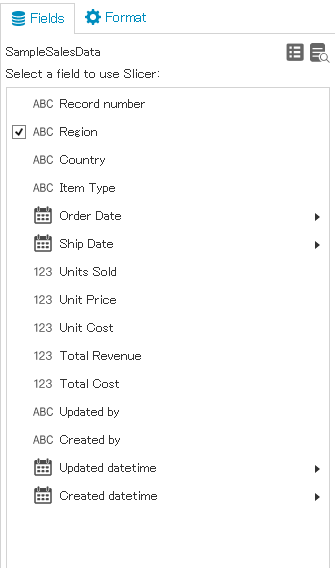
- Select a field for specifying the extraction condition from the Fields area on right.
- Drag and drop a chart from the chart panel on left to the page area.
- In the Data Source App dialog, select the app you selected for Slicer.
※Slicer is used for filtering charts or pivot tables that use the same data app.
Slicer Settings
Slicer Settings
Click the Slicer Settings of Design tab in ribbon area to open the Slicer Settings dialog where you can set the header text, and can choose the sorting and filtering options.
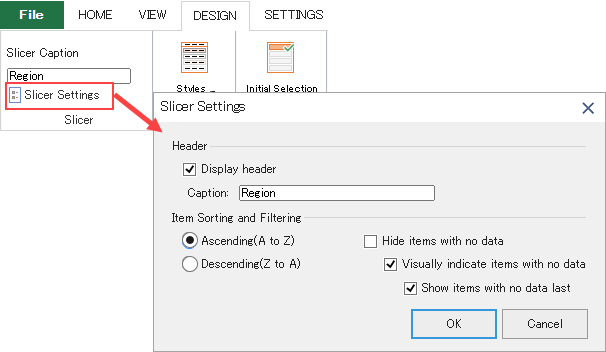
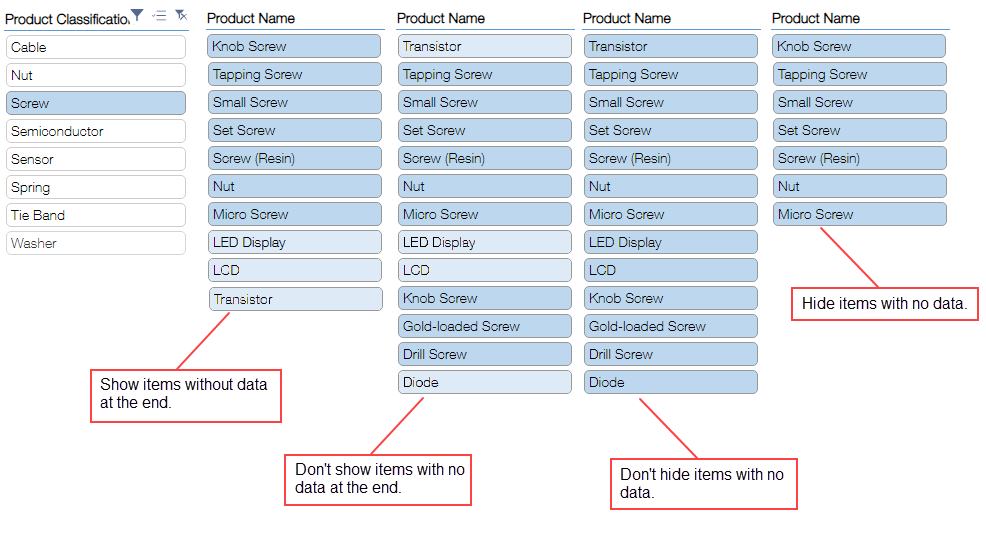
You can also specify how to display items with no data.
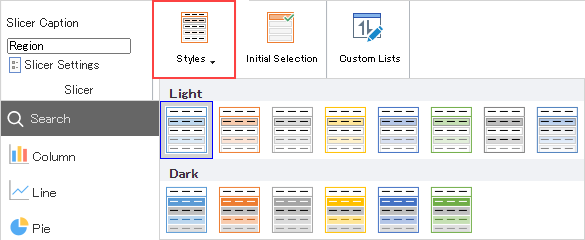
Change the Slicer Design
You can choose one of the 14 designs from Styles option in ribbon area.
Set Initial Selection
By default, all the items of slicer are in selected state at the time of initial display. However, you can specify the slicer items to be in selected state at the time of initial display by following the below steps:
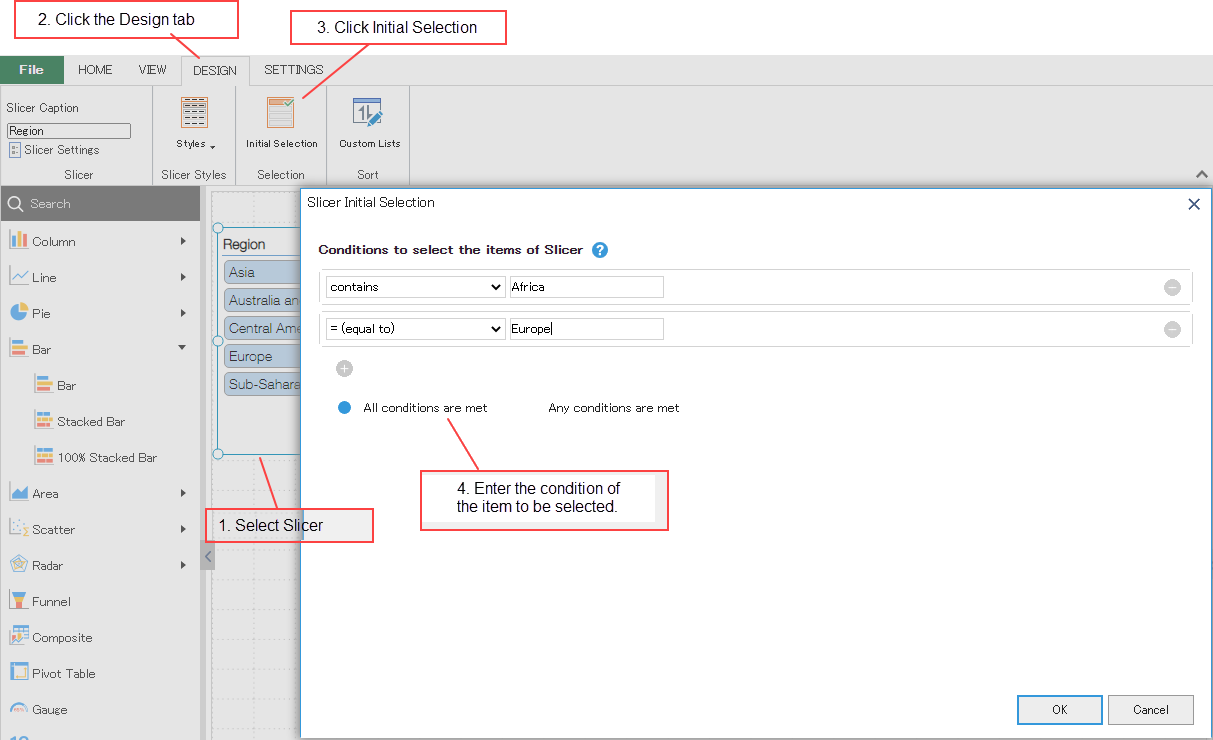
Method to specify the selection items is same as that filter settings and you need to specify a condition to select the items. Similar to filtering, method to specify varies for each field type.
| Field Type |
Way to Specify |
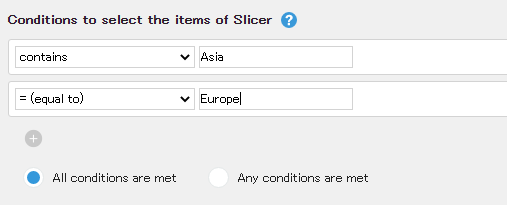
| Text / Link / Record Number |
Enter a keyword which is equal (not equal) to or contains (not contains) the item name.
Example) Select items containing "Asia" and items same as "Europe"
 |
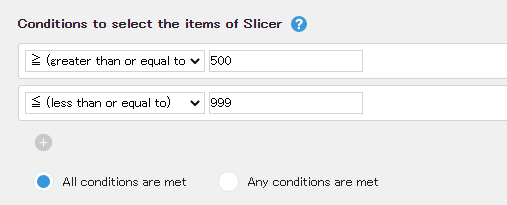
| Number |
Enter a value equal (not equal) to the item value or a range.
Example) Select items with value between 500 and 999
 |
| Radio button / Checkbox / Multi-choice / Drop-down |
Select the field items.
Example) Select "Cereal" and "Fruits"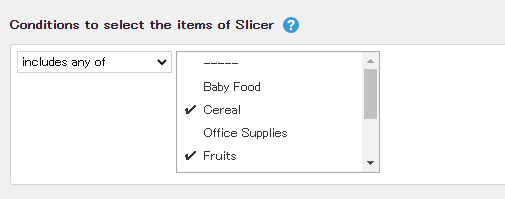 |
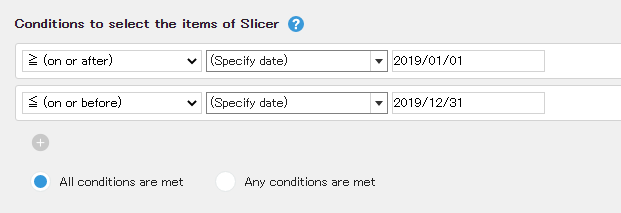
| Date / Time / Datetime / Created datetime / Updated datetime |
Enter a value equal (not equal) to Date/ Time/ Datetime or a range.
Example) Select items of year 2019
 |
| User selection / Department selection / Group selection / Created by / Updated by |
Selects user, department, group that includes user, department or group of item.
Example) Select "Akira Kamata"
 |
When krewDashboard is displayed on the kintone's record detail screen or krewSheet sub window, you can also use the field values of the displayed record as conditions in the same way as Filter using Record's Value.
Example) Select the same item as the Name field of the displayed record

Settings
You can also format slicer using the options of Format area. Select the slicer items to be formatted from the dropdown.
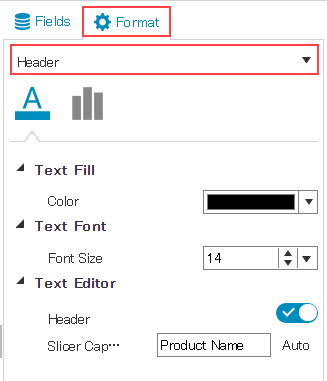
In krewDashboard, you can set following items of the slicer elements:
| Slicer Elements |
Setting |
Remarks |
| Chart area |
Fill (Color) |
Specify back color of the whole chart |
| Size (Width) |
|
| Size (Height) |
|
| Text Fill (Color) |
Specify font color for the whole slicer |
| Text Font (Font Size) |
Specify font size of the whole slicer |
| Column Count |
Specify the column count of slicer items |
| Button Height |
Specify the height of the slicer buttons |
| Header |
Text Fill (Color) |
Specify the font color of header |
| Text Font (Font Size) |
Specify the font size of header |
| Slicer Caption |
Specify any text |
| Horizontal Alignment |
|
| Select |
Fill (Color) |
|
| Text Fill (Color) |
|
| Unselect |
Fill (Color) |
|
| Text Fill (Color) |
|
- Slicer can be used only in the standard edition.
- Following fields cannot be used in the slicer.
- Rich text
- Text area
- Attachment
- Category
See Also